Portrait Grid Settings: turn on "knockout mode," set custom columns/rows, turn on/off feature frame, page breaks, and/or copy settings from another section.
| Editing portrait grid settings | |||
| Knockout mode | |||
| Columns & Rows | |||
| Feature Frames | Featured role | Featured name labels | Featured Images Placement & Size |
| Page Breaks Between Groups | |||
| Copying Settings from Another Section |
 | Access the following features in this area:
|
Editing portrait grid settings
Launch a page in the section in the editor by hovering over it. Click the Edit button to launch the page in the editor. | Check out the book. Customizing portrait pages may cause structural changes to your book, so no one can be actively editing it. |
Click on the Advanced tab to access the Portrait Grid Settings. Click on the > to open the drawer. | |
Knockout modeCreate spaces within your grid with knockout mode. Individual portraits may be toggled on/off, causing the portrait grid to reflow so no person is left out of the book. To turn on knockouts, simply turn the switch on.  Each portrait frame displays an eye-icon that is a toggle switch to turn the portrait frame on or off. |  |
Click on an eye icon to turn off a portrait frame. A red square will indicate that the frame has been knocked out.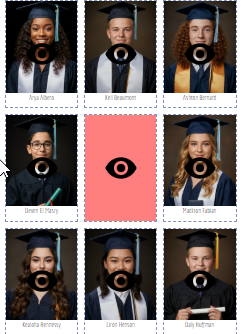 To turn the frame back on, click on the eye icon again. | Turn knockout mode off to continue customizing your pages. Use this option to create space for custom decorations, text, or simply be creative with your grid.  |
Columns & RowsDefine the number and arrangement of frames in your grid using columns and rows.  | For larger images, use a smaller number of rows and/or columns.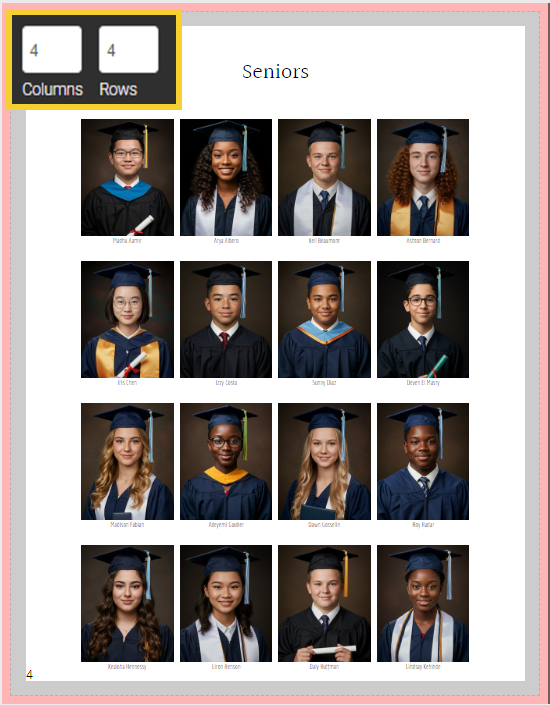 | To add more images per page, reduce the number of rows and/or columns. |
| As the number of portraits per page increases or decreases, the number of pages in your book may change to accommodate the entire portrait group at the current settings. When this occurs, a warning will appear to let you know that the page count has changed. . |  | Note: no portrait will ever get bumped out of the book by a grid setting change. Portrait grids are designed to flow in/out to accommodate every image in the group. |
Feature FramesUse feature frames to highlight homeroom teachers or senior administrators on their pages.
| Important: This feature only works if a role has been assigned to the person who needs to be featured. The portrait manager allows you to quickly designate roles for individuals. Learn more about role assignment. | ||
Turn on the Show featured frame(s) toggle to show an additional advanced drawer -- Featured Portrait Options.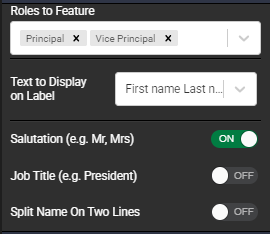 |  | ||
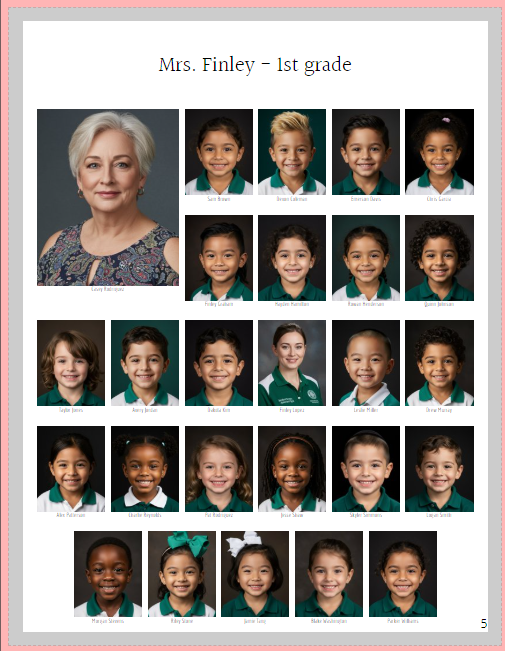
Featured roleFeatured Portrait Options let you specify which role to feature: teacher, assistant teacher on a classroom page; principal, vice principal on a staff page, etc. | 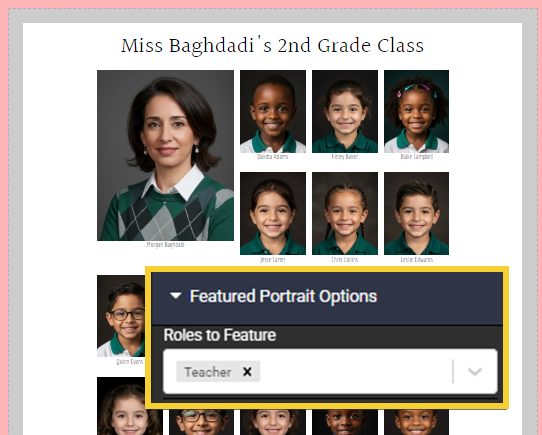 | ||
Featured name labelsFeatured portrait options let you specify special name labeling rules for the featured image.
 | In this example, the featured images (principal, vice principal) display only their last name, with their salutation and job title.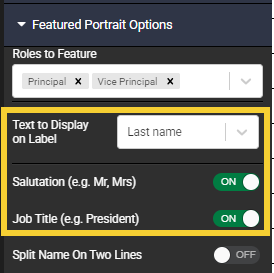
| ||
Featured Images Placement & SizeThe Portrait Grid settings include an option to keep the featured images on a separate row and/or enlarged to a 2x2 area on the grid. |  |


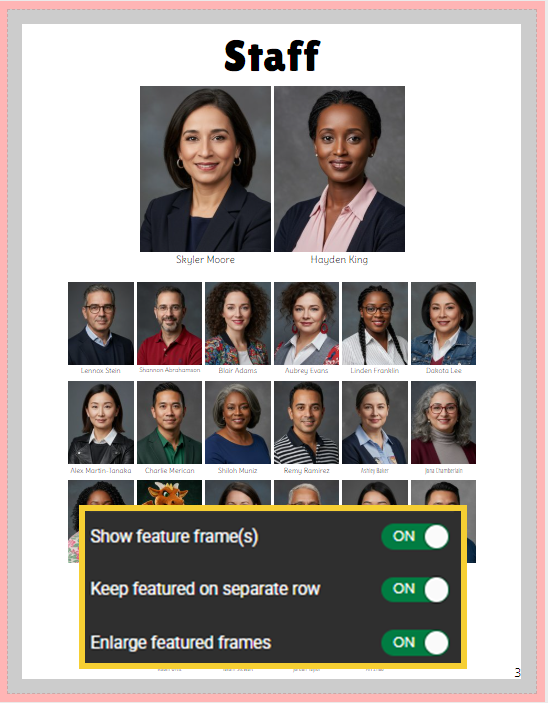 |  | 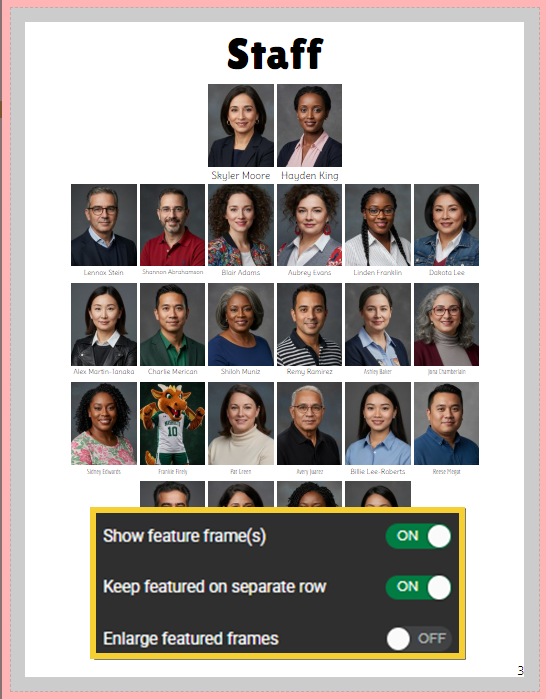 |
Page Breaks Between GroupsBy default, each groups will be separated by a page break.  | 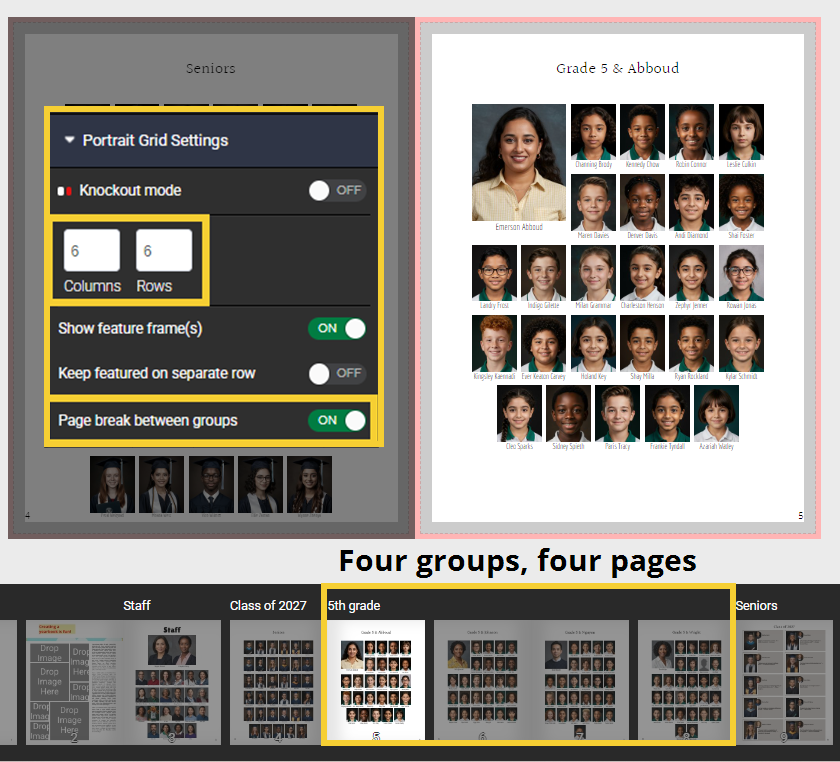 |
| To conserve space in your book, you may optionally turn page breaks off between groups. Note that you may need to increase the number of rows and/or columns to achieve the desired effect. More frames on the page, the more room for additional portraits. Changing the page title height will also assist to condense your page(s). |  |
Copying Settings from Another Section
| If you have completed formatting a portrait section and now wish to reuse the same settings on another section, use the Copy Settings option. Open one of the pages in the section you wish to format in the editor, then access the dropdown to choose which portrait section to use as a model. Click apply settings to apply the same configuration from the Portrait Grid Settings to the current section. |  |
Was this article helpful?
That’s Great!
Thank you for your feedback
Sorry! We couldn't be helpful
Thank you for your feedback
Feedback sent
We appreciate your effort and will try to fix the article