Images may be viewed within the album as a photo stream, with icons appearing on the image preview to provide status and information.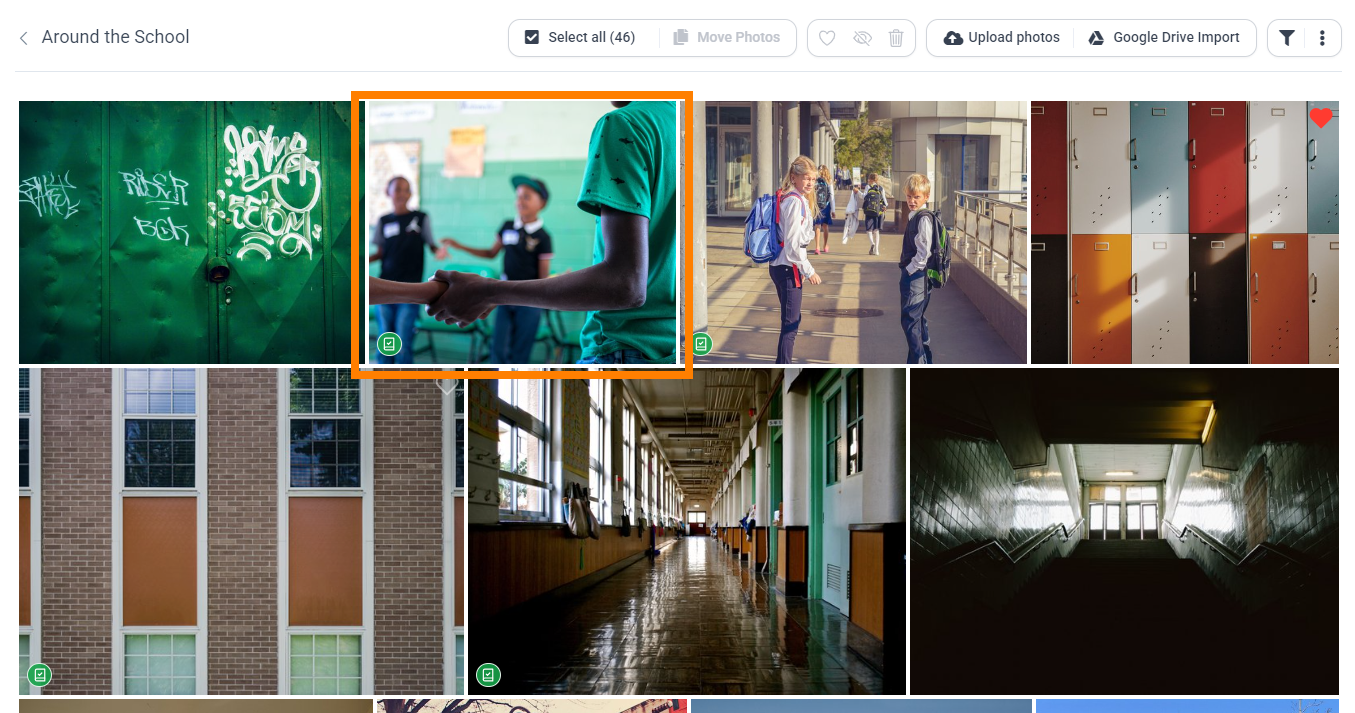 | Clicking on an image opens it in large preview, providing additional info and controls.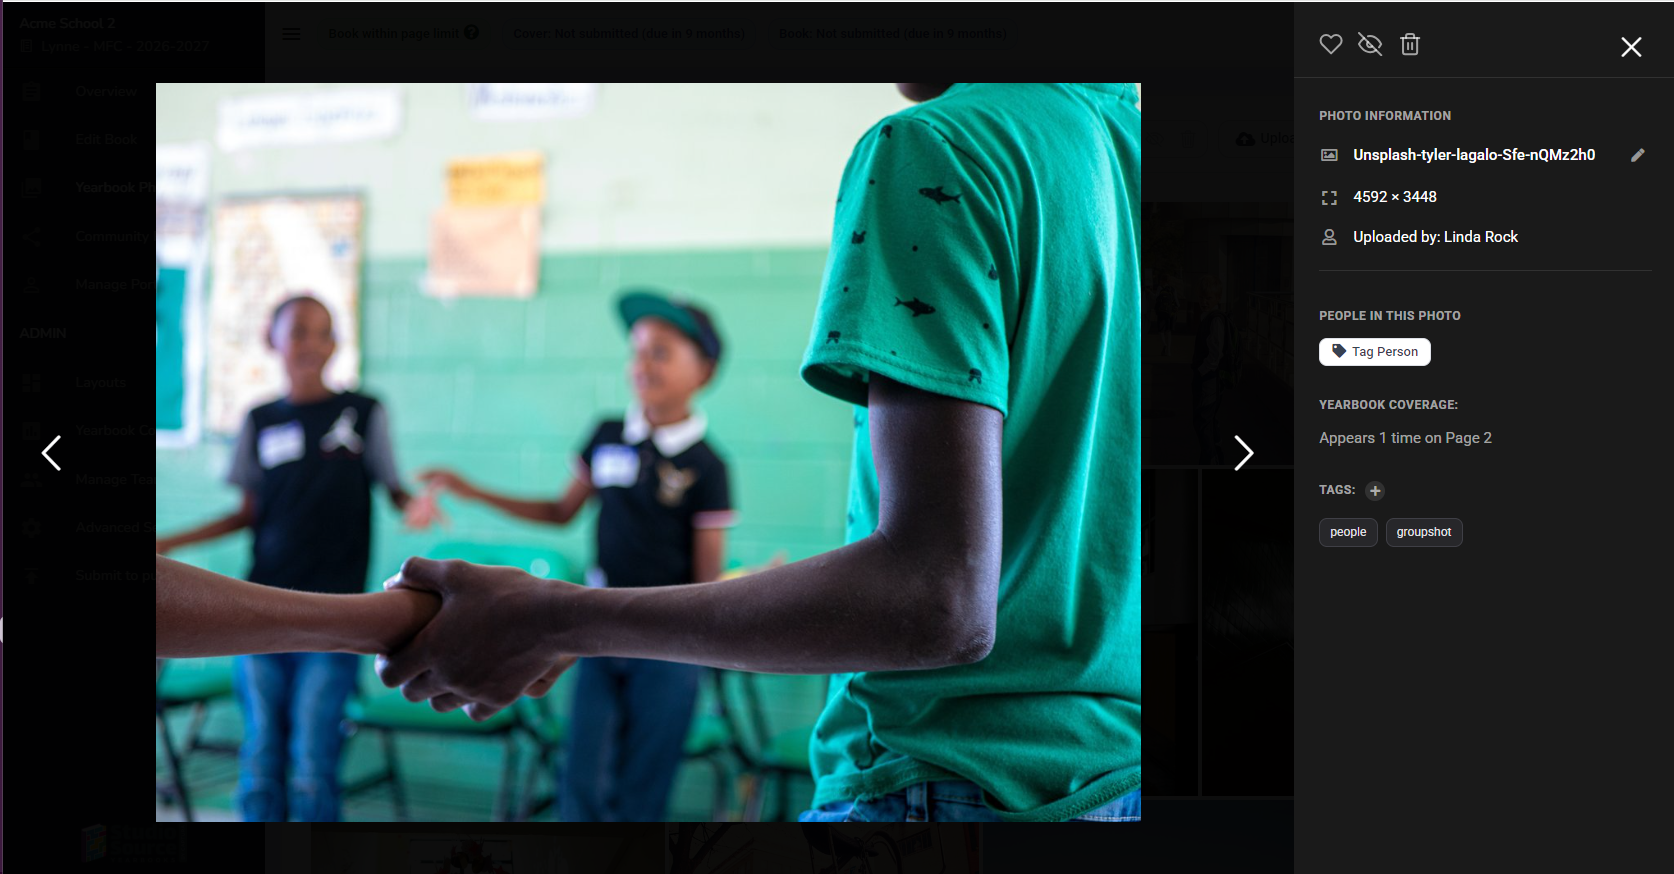 |
Renaming an image | |
In the photo stream, first ensure that the filter is set to display the image file name. Click directly on the file name on the image preview to rename it.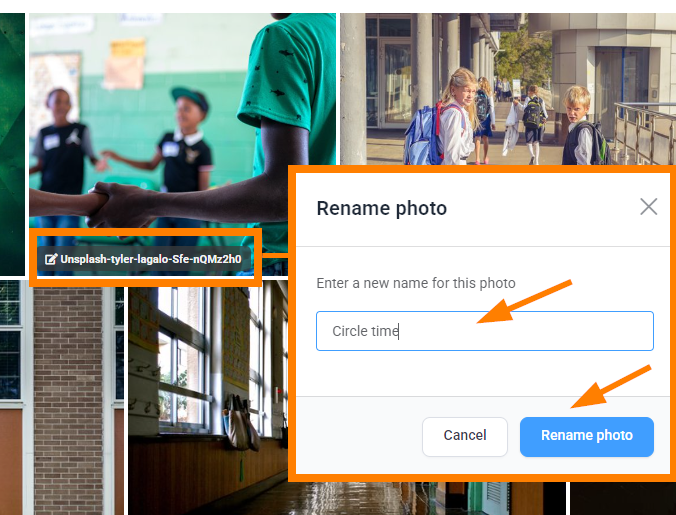 | Click on the image to open it in large preview. Click on the pencil icon next to the file name. Type a new name, then click the check mark.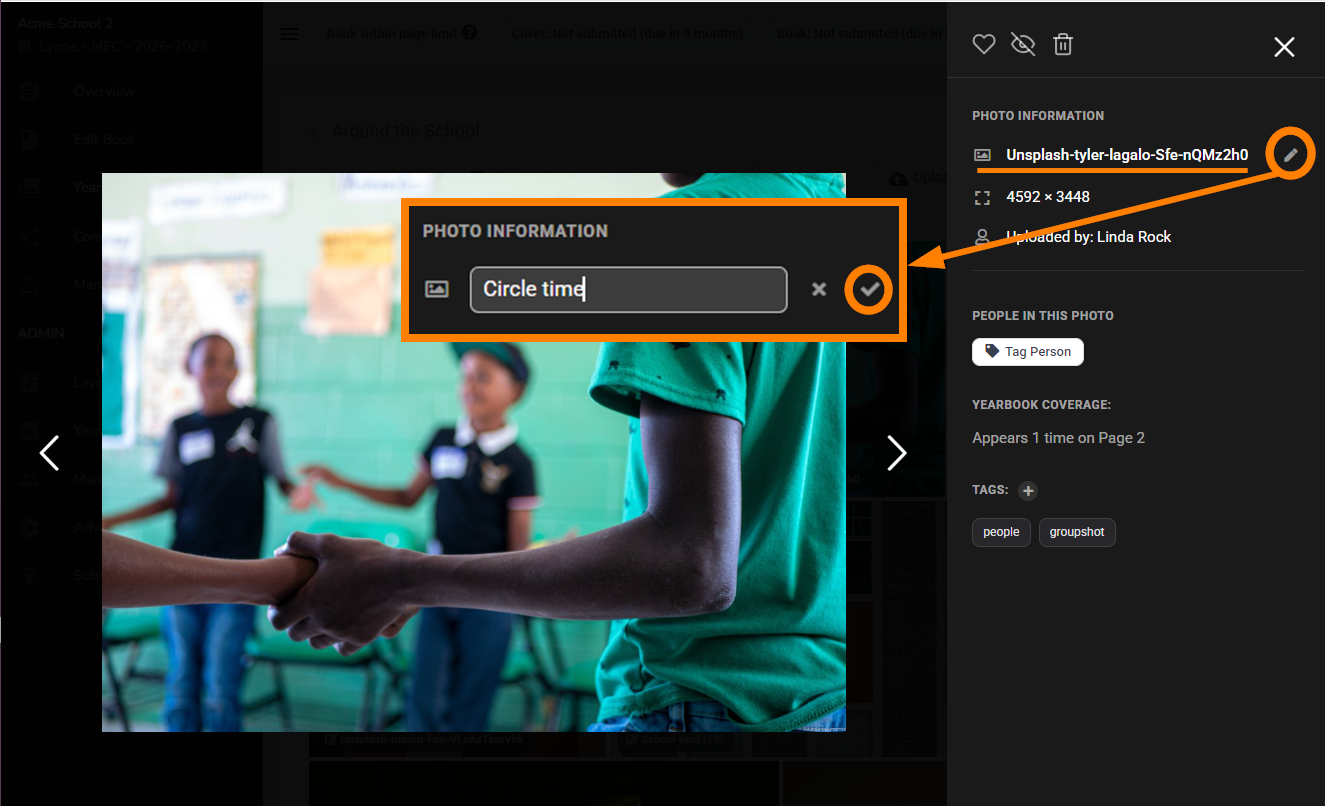 |
Setting an image as a favorite
Favourite images options in the editor to help you find content quicker. Favorite images are placed in a favorites folder and may be filtered. Favorite status is set in the photo manager.
In the photo stream view, hover over an image to access the heart icon in the top right. Click it to mark the image as a favorite.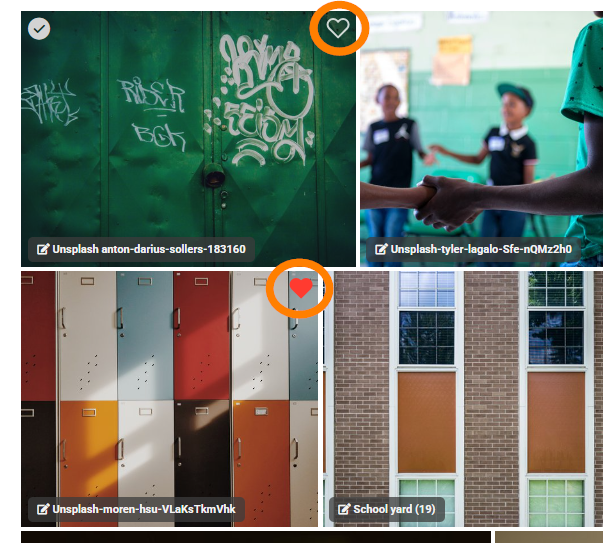 | In large preview, the heart icon is available at the top of the info pane. Click on the heart to mark the image as a favorite.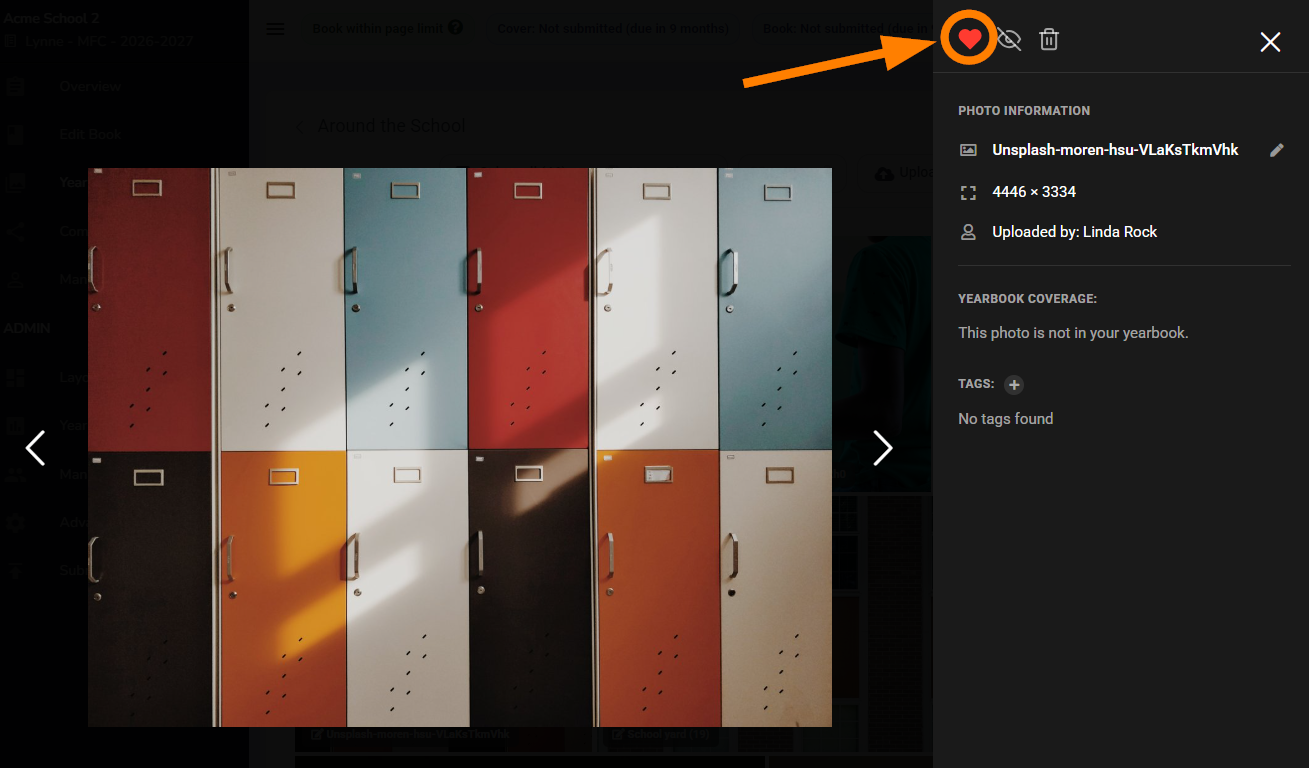 |
Deleting versus hiding an image
Images may be permanently deleted or hidden from view, which allows you to declutter your image stream without making an irreversible decision.
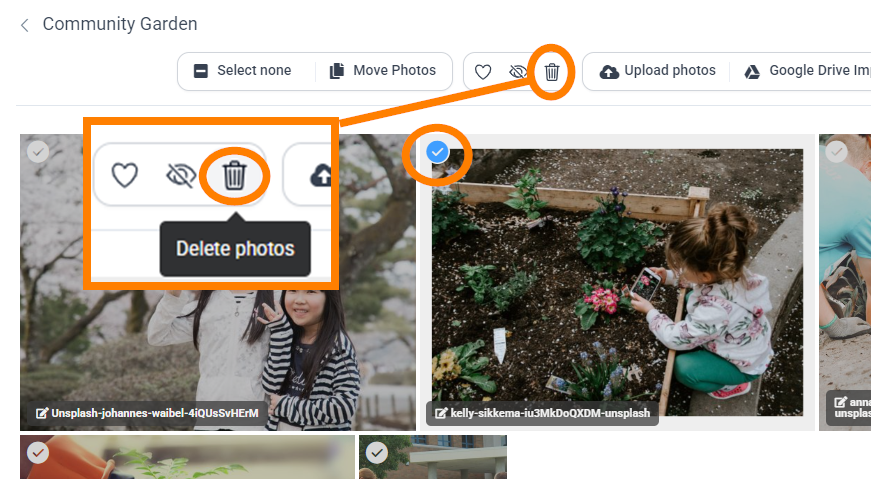
To delete images from the image stream
| To delete an image on large preview, click on the delete icon at the top of the left side pane. Click the icon again to confirm the deletion.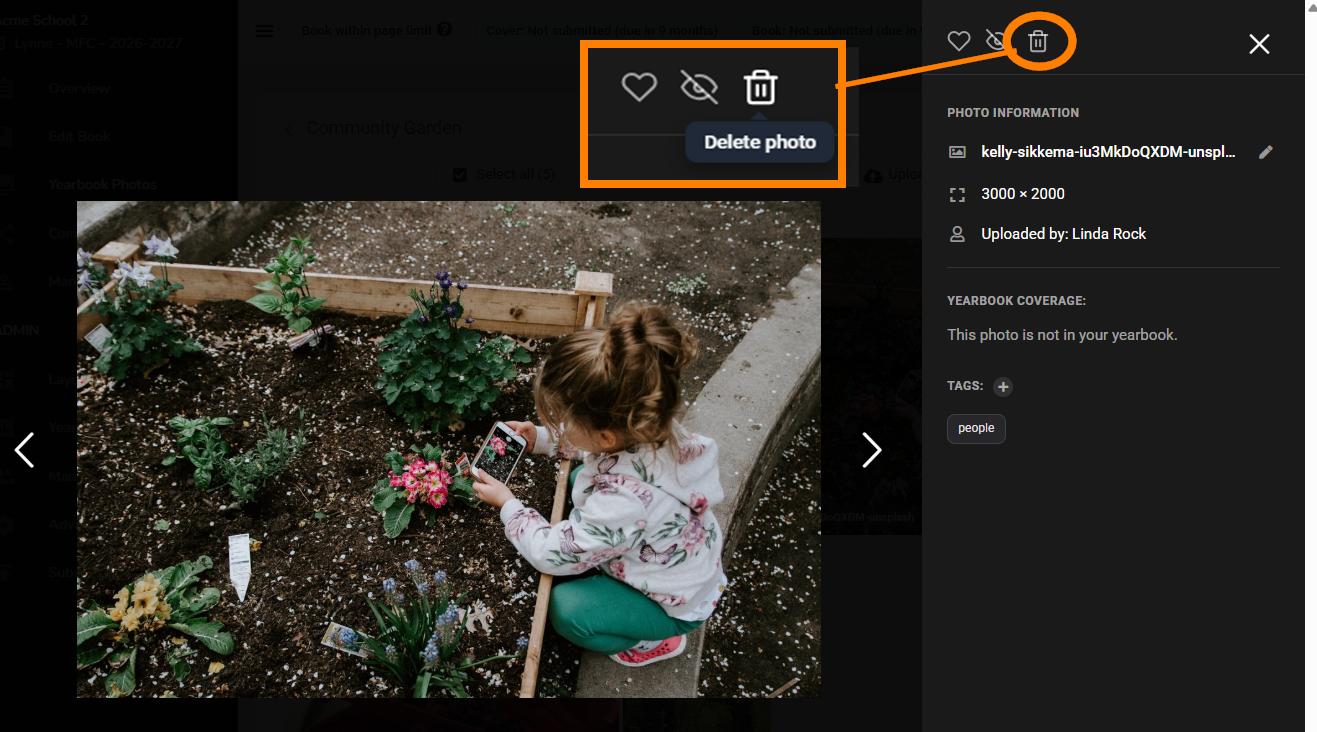 |
| 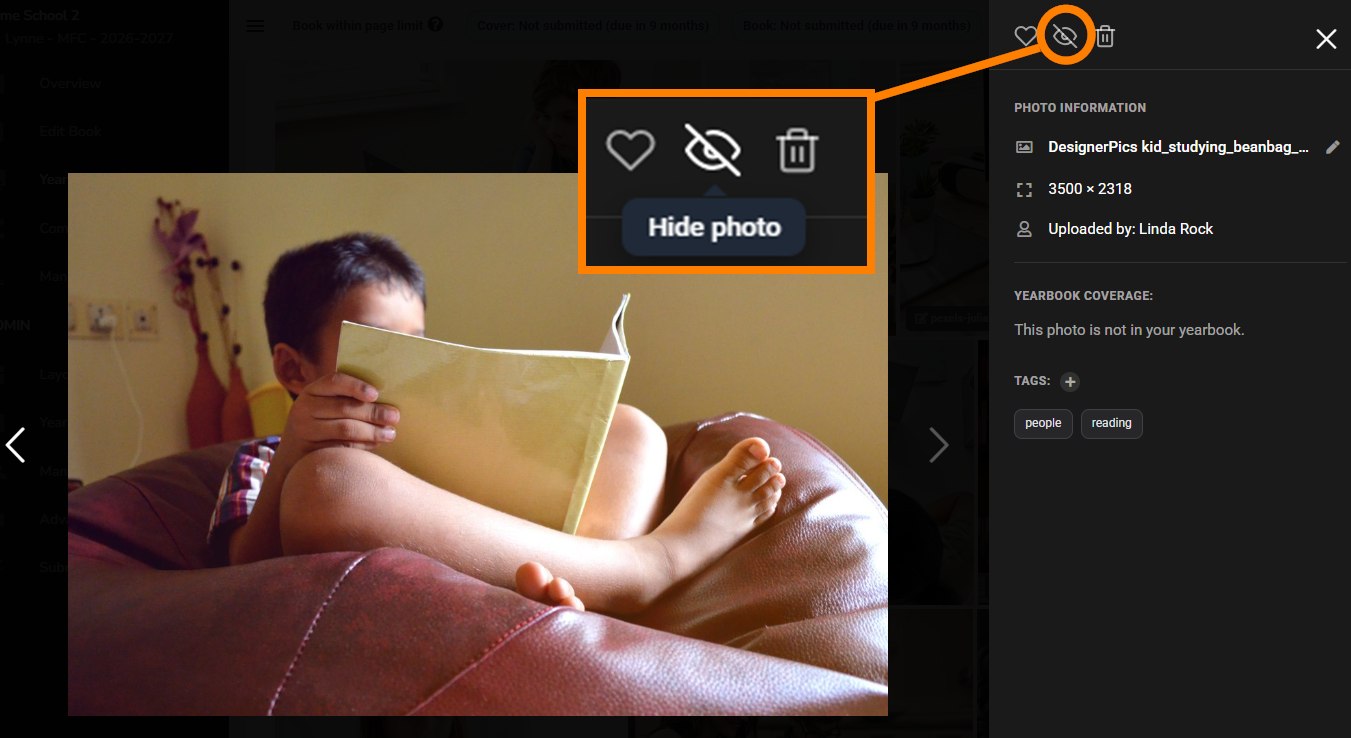 |
Reviewing similar photos (to clean up duplicates & burst-mode)
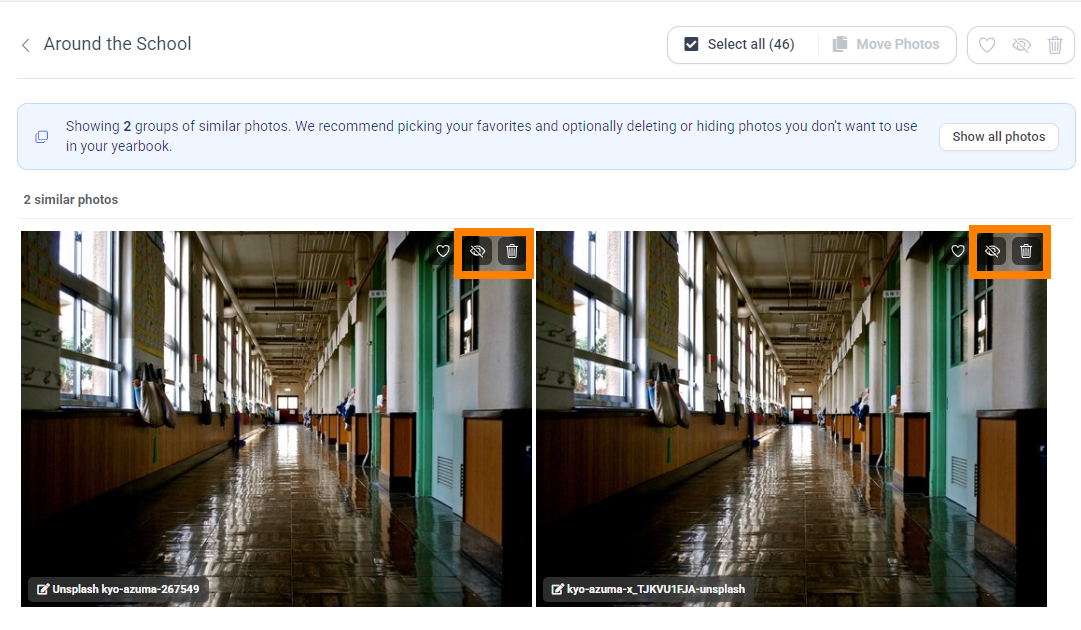
| Memento auto-detects images that are very similar, allowing for a quick triage of duplicate images or images taken in camera burst-mode. By hiding or deleting extra (nearly) identical photos, it becomes easier to select photos to place onto your pages in the editor. If the photo manager detects similar photos, an option will appear under the filter in the photo stream view. Click on Review Similar Photos to see which images have been flagged. | 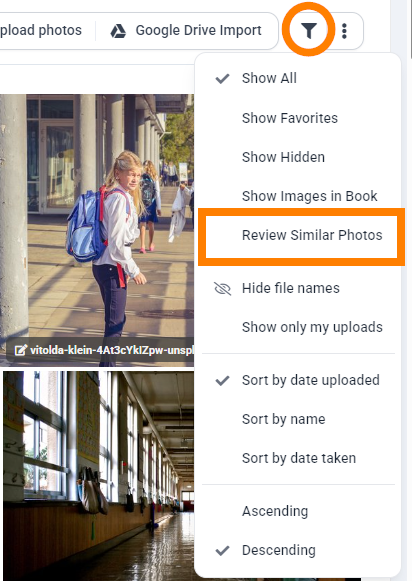 |
Review the images to see which you would like to keep. Either hide or delete duplicates, leaving a smaller selection of images available for use in the editor. Note that you can click on any image to review it in detail, using the previous/next arrows beside the image to see the images in more detail.
Used image indicators and coverage
In the photo stream, filter for images used in the book. Only the images that have been placed in the book will be displayed.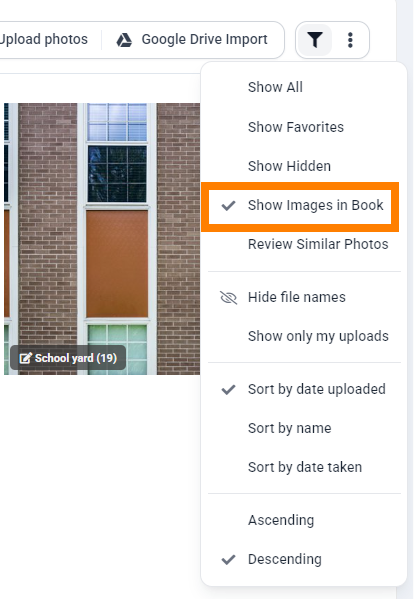 | In full preview, usage is tracked, showing the page number(s) where the image has been used.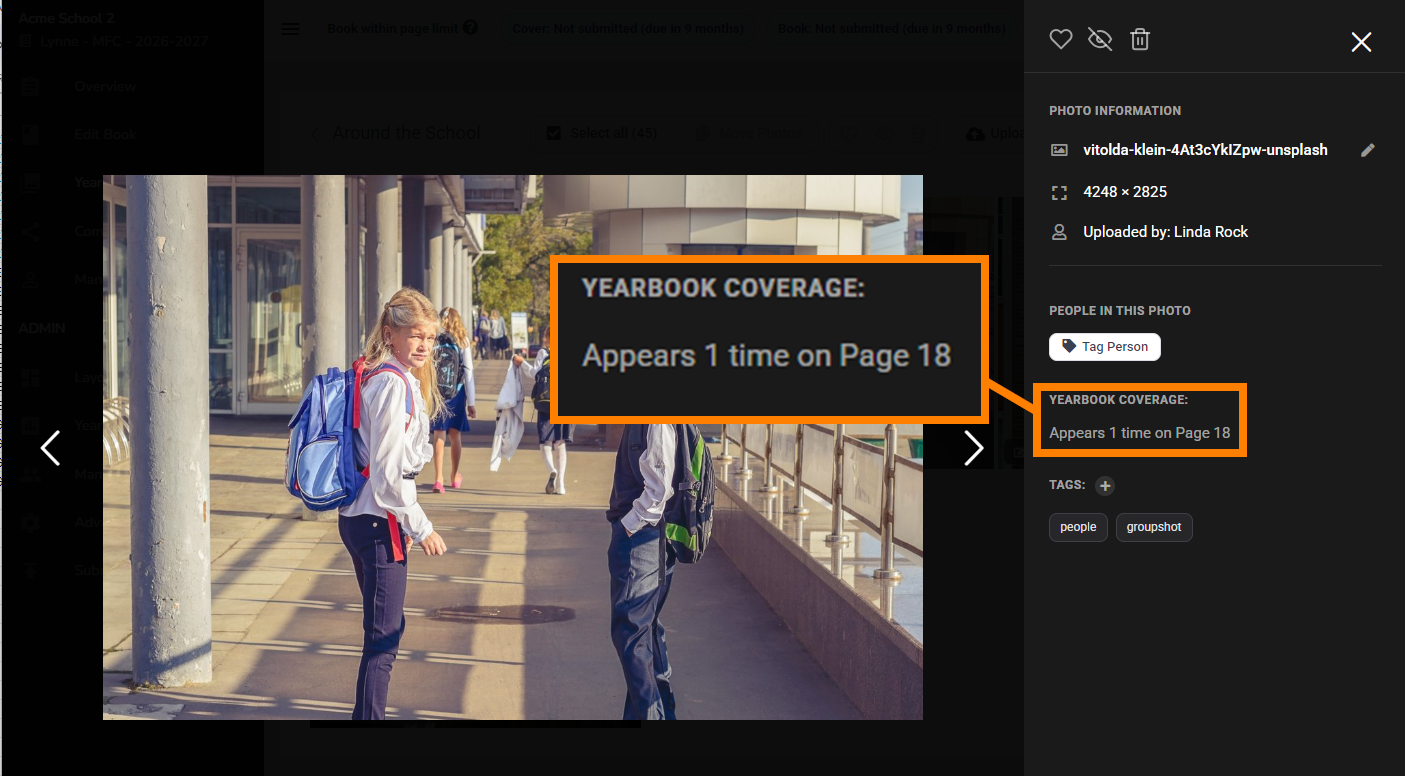 |
Image Tagging
Memento enables two types of image tagging: tagging by subject and tagging by person.
Tagging by subjectMemento reviews images to auto-tag them by subject. Tags are searchable in the Photo tab in the editor, making it easier to find the images to place on your pages. Open any image in preview to review the automatic tags. | 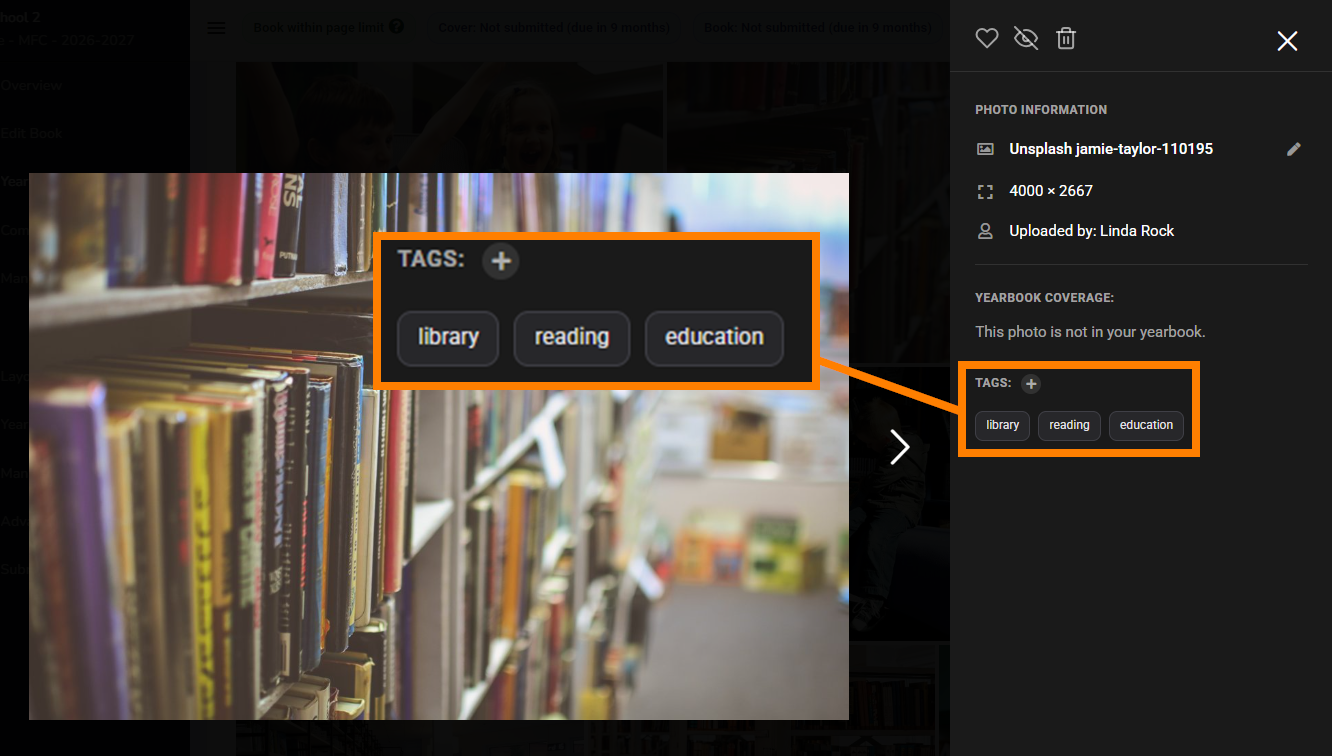 |
| To remove automatic tags, hover over a tag then click the x to remove it. | 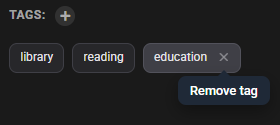 |
| To add your own custom tag, click on the + next to the Tag option. Type your own tag. Click the checkmark to confirm the tag. | 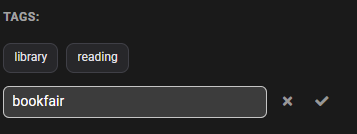 |
Tagging by person
| 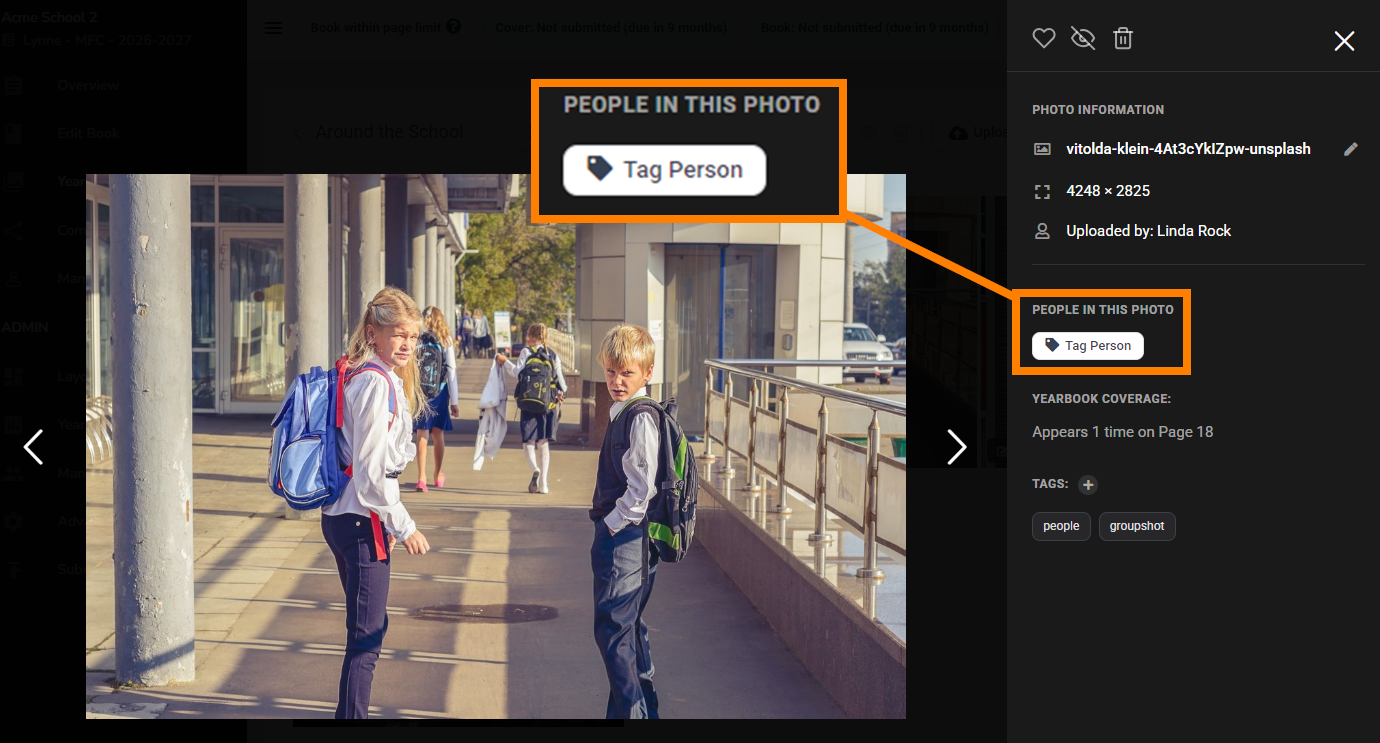 |
| 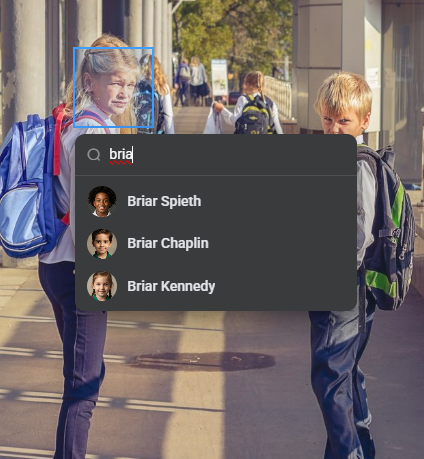 |
| The tagged portrait will appear on the left side pane. To remove the tag, hover over the portrait. Click the x to remove it, and confirm your choice. | 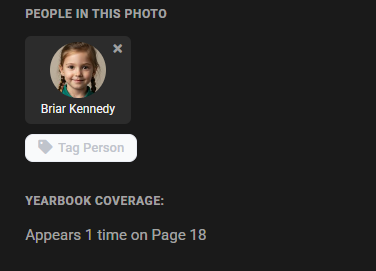 |
Image ResolutionThe editor displays warnings for images that fall below recommended resolution limits. Resolution warnings calculate many pixels are spread over each inch of your canvas (DPI). If that result falls below your publisher's limits, a warning will appear, helping you to avoid poor quality images when your book is printed. An image with a small pixel count may print fine if it is kept small on the page. Enlarged or zoomed, it becomes blurry. | 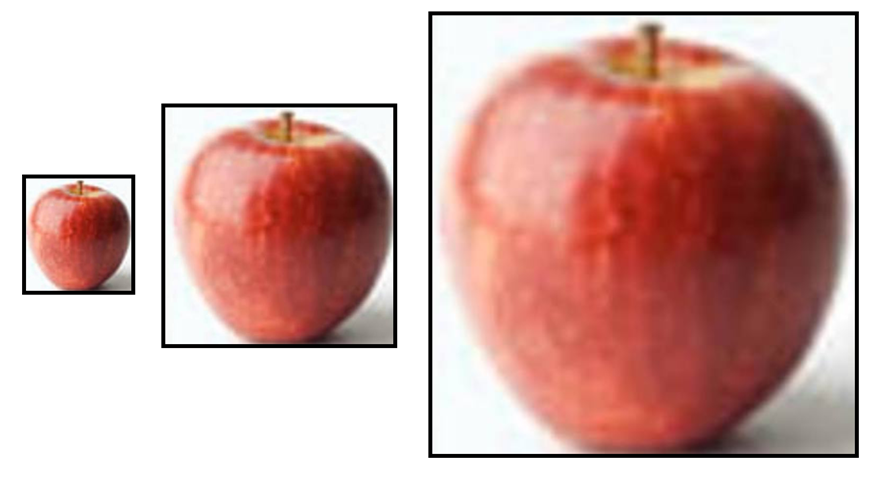 |
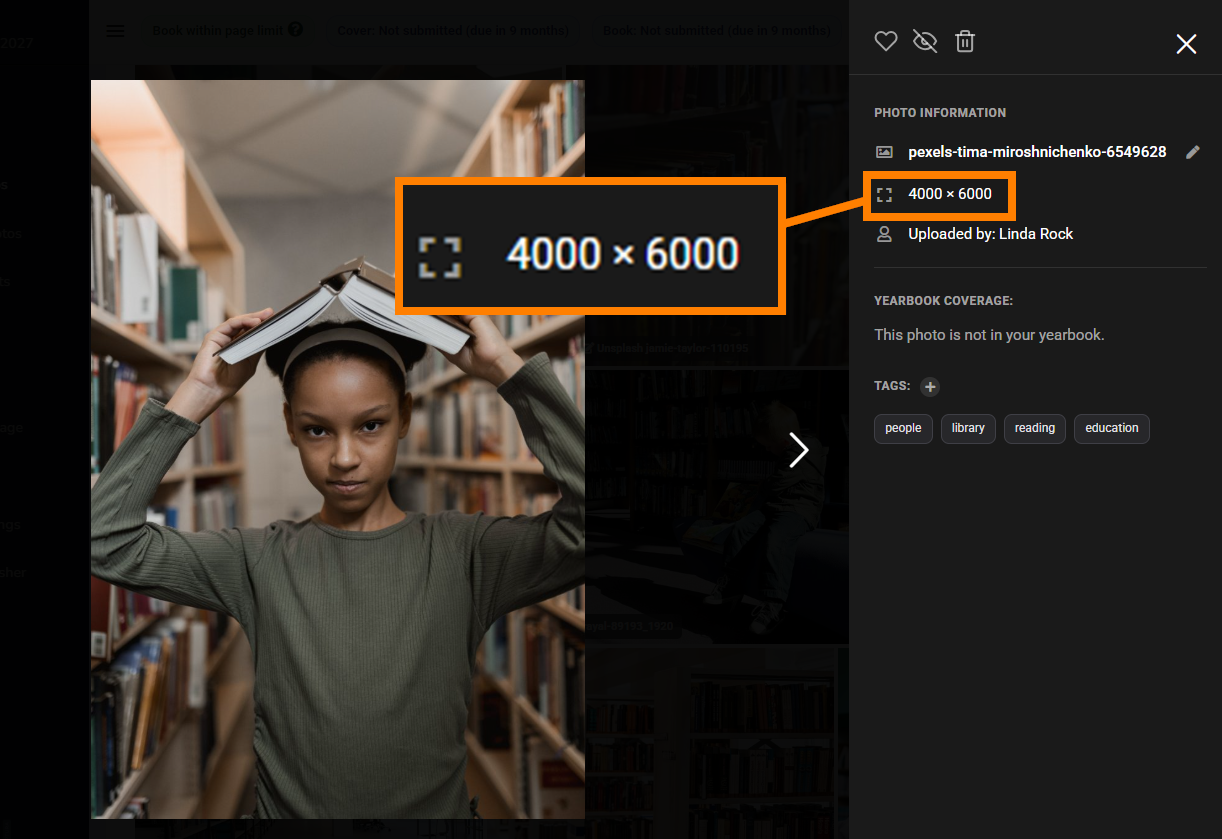
| To quickly see the resolution in pixels of any image uploaded to the photo collection, open the image in full preview. The pixel count is displayed in the left-side pane. For reference, here are some sample resolutions for 300 dpi print-quality images sizes.
|  |
Downloading Images
The images will download a .zip archive to your Downloads folder. | 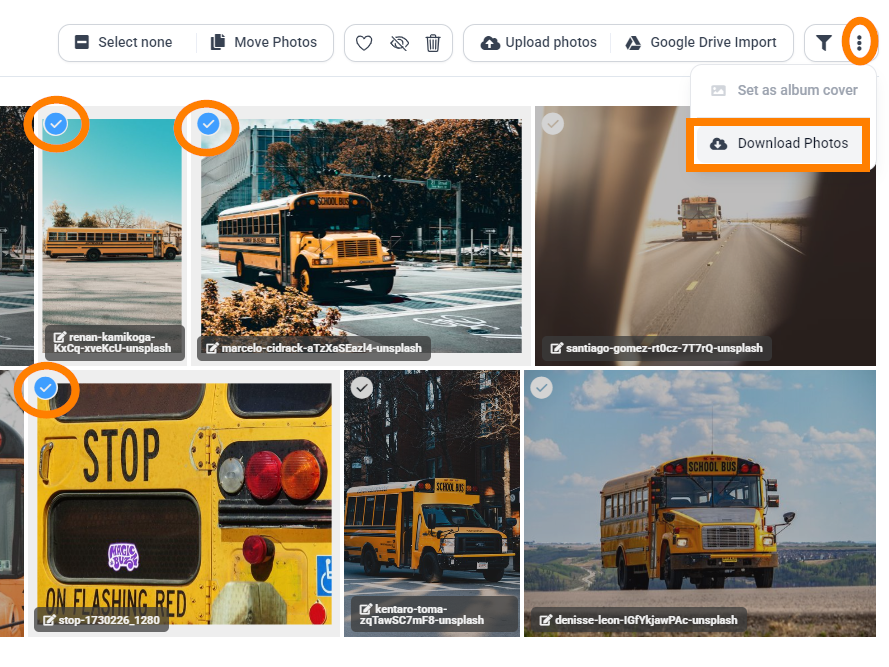 |
Was this article helpful?
That’s Great!
Thank you for your feedback
Sorry! We couldn't be helpful
Thank you for your feedback
Feedback sent
We appreciate your effort and will try to fix the article